Video: https://youtu.be/Dx6edbY5YN8
Transcript:
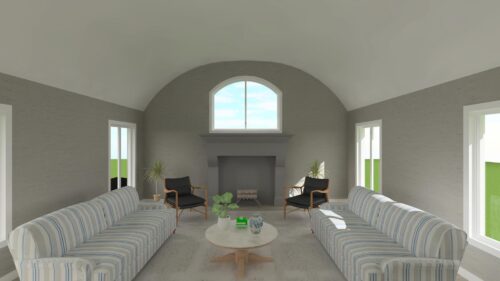
A Barrel Ceiling in Envisioneer can be created using the Arched option once a gable cathedral ceiling has been created. In our example, an 18’ x 36’ structure with a Barrel Roof has been created. The front and back of the design are set to be gables, and we want the ceiling to follow the shape of the roof.

- Let’s first insert a ceiling into our design by selecting Insert > Ceilings > Ceiling by Perimeter or by selecting the drop-down option beside the Ceiling button under the Building Tab and then selecting Ceiling by Perimeter.
- Select the ½” Drywall Ceiling option under the Unframed folder and left-click once in the middle of the design to insert the ceiling. You will now see an orange dotted line around the interior perimeter of your walls.
- Select the ceiling, right-click it, and select Properties.
- Under the Basic tab, select the Cathedral option under the Type section and press OK.
- In your 2D Plan view, select the top and bottom arrows to highlight the edges of the cathedral ceiling, right-click, and select Properties.
- Under the Basic tab Properties section, adjust the Edge Condition b-Skirt Width to be 0”. This will remove the skirting along those edges.
- Then, adjust the Edge Shape to be Gable.
- Press OK to close the Ceiling properties dialog and accept the changes.
- In your 2D Plan view, select the left and right sides of the ceiling. Make sure no other arrows are selected. If they are, deselect them by clicking on them again. Then right-click and select Properties.
- Under the Basic tab, in the Properties section, adjust the Edge Condition b-Skirt Width to 0” and the Edge Shape to Arched. This now sets the left and right edges as an arched ceiling, and we can see the new values to edit in the Properties section.
In the Properties, we will set these values based on information from the structure and values we want to use for our design.
- The first value we are going to adjust is the c-Start Angle. We are going to set this to 60°. You can adjust this value if the starting angle is steeper.
- Next, we are going to adjust the f-Vertical Distance. This value should be half of the radius of our design. Since we want our Radius to be 9’, we are going to enter a value of 4’-6” here.
- The last value we are going to adjust is the e-Radius. The radius is going to be half the width of our design. Since we know the structure is 18’ wide, we will set our radius to be 9’.
- Notice the d-End Angle. Based on the values we inserted, it automatically adjusts to 0°. You can adjust this value if you want to change the shape of the arch.
- Select OK in the Ceilings dialog to accept the changes.
Your new Barrel Ceiling has been created, and you can now view your new ceiling design from any 3D Camera View.